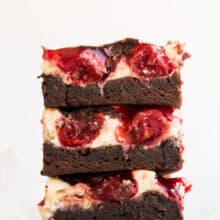
These Cherry Cheesecake Brownies start with fudgy homemade brownies, topped with cheesecake and cherry pie filling. They are the BEST brownies! Includes step by step recipe video
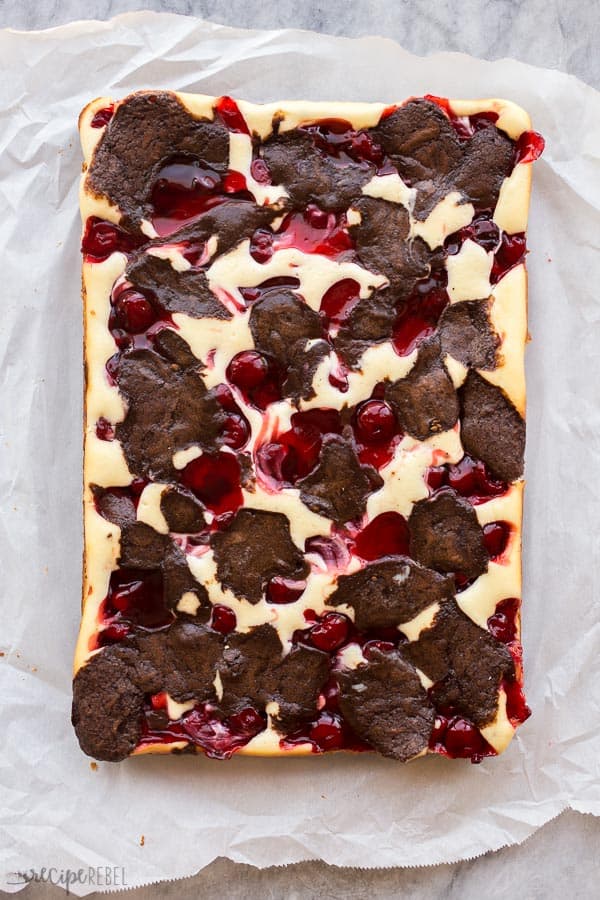
Table of Contents
When I came up with these brownies, I thought I was a complete genius.
I ate a lot of cheesecake in my University days.
When we lived in the city while I attended, we had a weekly “tradition”, if you will, with friends of ours: the guys went for wings and the girls went for cheesecake.
Kind of the best tradition ever, right?!?
Now that we have kids and don’t live in the city anymore, we don’t eat nearly as much cheesecake. It’s pretty sad, but luckily there are quite a few treats that are coming out of this kitchen.
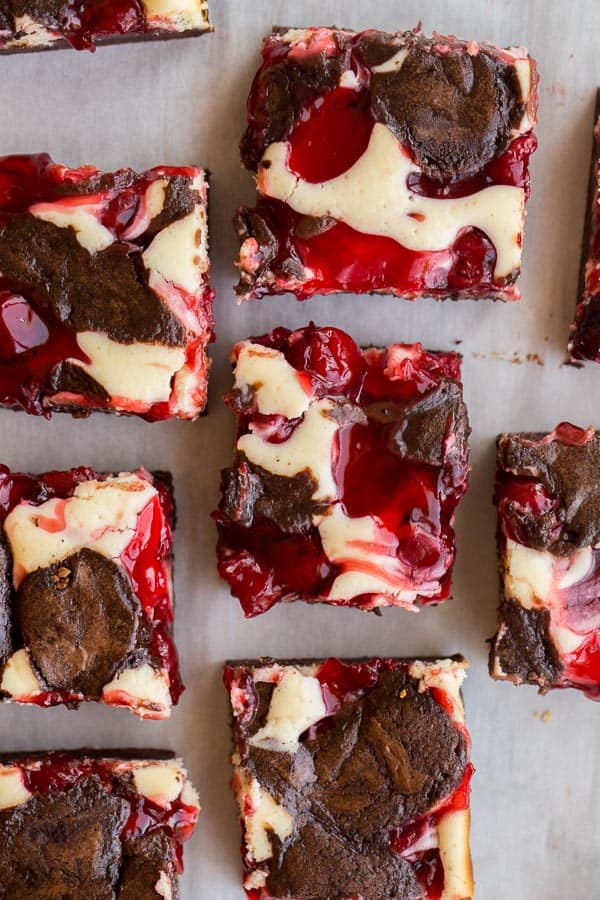
These Cherry Cheesecake Brownies are one of my favorites (and I don’t make them nearly enough!), but this No Bake Oreo Cheesecake or even this classic Easy Cheesecake Recipe will do the trick just fine!
Luckily though, my good friend and cheesecake-eating partner was out for a visit the day that I made these the first time, so I had someone to share them with. She approved, and so here we are today!
Variations on these Cherry Cheesecake Brownies:
- You can swap the cherry pie filling for any flavor of pie filling — strawberry, blueberry or mixed berry would also be great!
- For a holiday twist, color the cheesecake filling with green food coloring (don’t add any mint flavoring though, I’m not sure mint and cherry are a good idea!)
- Make individual cherry cheesecake brownies in a muffin pan or mini muffin pan — use paper liners for easy removal
Tips and Tricks for Making the Cherry Cheesecake Brownies:
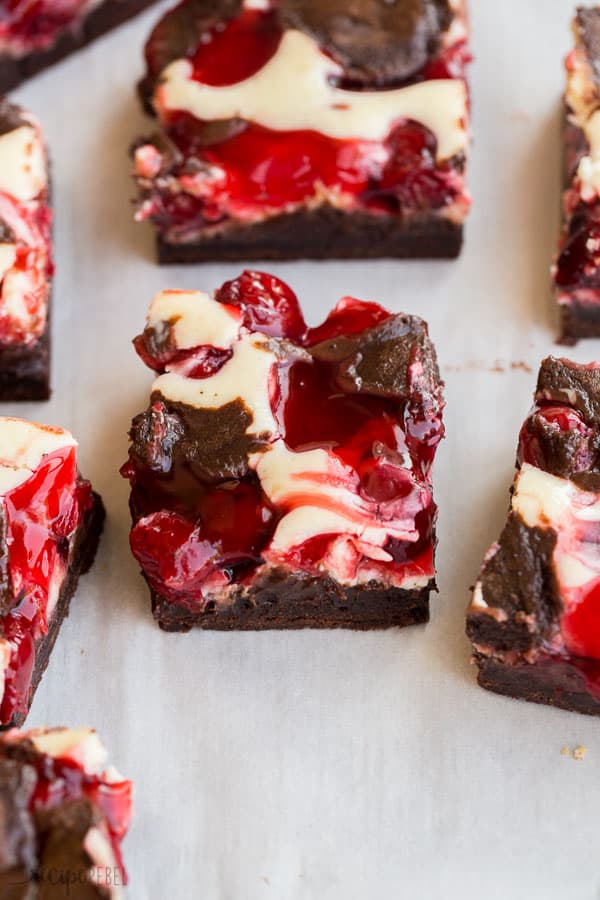
- The batter will be thick, so you won’t be able to spread the top layer well. That’s okay! It will just give you a peek of what’s inside.
- I use whole wheat flour because in this recipe you really can’t tell the difference. All purpose works perfectly as well!
- You can healthify the recipe slightly by using light cream cheese (which I usually do) and reduced sugar pie filling or making your own.
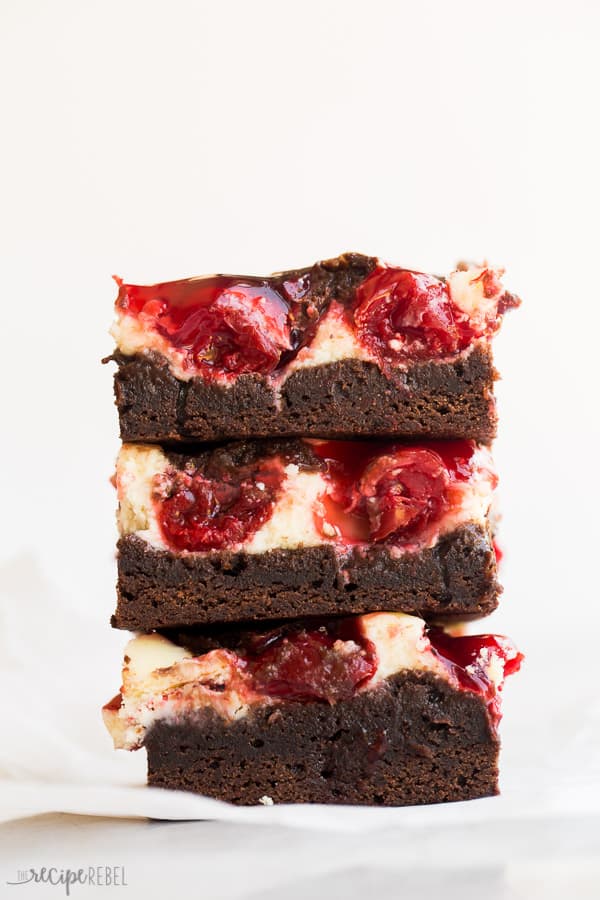
Cherry Cheesecake Brownies
Ingredients
Brownies:
- 1 cup butter melted, cooled slightly
- 2 1/2 cups granulated sugar 500g
- 1 tbsp vanilla
- 4 eggs
- 1 1/2 cups whole wheat flour (or sub all-purpose) 190g
- 1 cup cocoa 95g
- 1/2 tsp salt
Cherry Cheesecake filling
- 1 8 oz package cream cheese
- 1 egg
- 1 tsp vanilla
- 1/3 cup granulated sugar
- 1/2 can cherry pie filling
Instructions
- Line a 9×13″ pan with tin foil and spray with cooking spray — this makes for easy clean up. Preheat the oven to 350 degrees F.
- BrowniesIn a large bowl, whisk together melted butter and sugar until smooth. Add vanilla and eggs and whisk until combined.
- Add flour, cocoa and salt and stir until combined. Batter will be thick.
- Spread half (or just over half) of the batter into the bottom of the pan.
- Cherry Cheesecake filling:With an electric mixer, beat cream cheese, egg, vanilla and sugar until smooth.
- Spread the cream cheese mixture over the brownie batter. Top with spoonfuls of cherry pie filling and spread slightly.
- Drop spoonfuls of remaining brownie batter on top of the pie filling. You won’t be able to spread the brownie batter easily, you will just try to cover a good amount (but certainly all) of the filling with the batter. Smooth out the batter the best that you can.
- Bake at 350 degrees F for 30-35 minutes, until center appears set. Note that your brownies might still have a little jiggle to them — this is because of all of that gooey deliciousness below. I baked mine for 35 minutes in a dark non-stick pan.
- Let cool to room temperature before cutting. They will cut more easily if refrigerated for a few hours, but I couldn’t wait, so I didn’t!
Nutrition Information
Want to save this recipe?
Create an account easily save your favorite content, so you never forget a recipe again.
Tried this recipe?
Tag @thereciperebel or hashtag #thereciperebel — I love to see what you’re making!
Tag @thereciperebelPost and recipe updated from February 3, 2015

El says
Very rich and delicious. Will definitely be making these again. Thank you!
Marilyn says
I made these & they are delicious! A big hit with everyone! 😃
The Recipe Rebel says
Great to hear, thank you Marilyn!
Sheryl says
Can these brownies be frozen to eat at a later date?
Darlene says
I made these and they were delicious!! Love them. Just curious though, would they bake and turn out just as nicely in tin pans as they do in metal??
The Recipe Rebel says
Hi Darlene! I’m sure they would! So glad you enjoyed the recipe! Thank you for this kind review!
Jelema campolio says
They are wonderful. Taking them to a family reunionI think I’ll try in mini muffin pans
The Recipe Rebel says
Hi Jelema! So glad you enjoyed the recipe! Thank you for this kind review!
Arnold says
Everyone had a comment and it was OMG these were so good.
The Recipe Rebel says
Hi Arnold! So glad you enjoyed the recipe! Thank you for this kind review!
Debbie says
I haven’t tried them yet. Waiting for my brother to come to town … but I have a question, do you lift the brownies out of the pan before cutting?
The Recipe Rebel says
Hi Debbie! Yes! I’m not sure if you could see from the first photo that the brownies are out of the pan uncut. You can use foil or parchment paper to help you. ENJOY!
Stacy says
Made this today for my sons school teachers as part of teacher appreciation week. It was a hit! While I felt it could have been baked a little longer than the max recommended time as it felt underdone in the middle brownie; I prefer undone than over with brownies. The flavour was certainly there regardless. I will make it again for sure!
I made 2. Both in glass 9×13 pans one with parchment paper the other without. They baked the same and cut and came out of pan nicely. But certainly cut better once cooled for a couple hours.
The Recipe Rebel says
Hi Stacy! So glad you enjoyed the recipe! Thank you for this kind review!
Blu says
Can i butter the pan and not use tin foil?
The Recipe Rebel says
Hi Blu, I’ve only tested this out with the foil so it’s hard for me to say. Let me know if you decide experiment with it.
Chef Gonzales says
I’m going to make these for a Christmas party. Would it work better to put the cheesecake in a bath of water?
Won’t the top burn? Or crack?
The Recipe Rebel says
Hi! I’d stick to the recipe as written! They come out just fine. Hope you enjoy them!
Debbie says
Just wondering can you use maraschino cherries instead of pie filling?
Thank you
The Recipe Rebel says
Hi Debbie! I would not use that.
Jenny says
Hi there! I was wondering if I could use boxes brownies? I have everything to make them either way, just wasn’t sure if it would make a huge difference. Thanks!
The Recipe Rebel says
Hi Jenny! I’m partial to making them this way but I guess you could use a boxed brownie mix. I haven’t tested them that way myself.
Sherri says
I have a new favourite special occasion dessert! This is amazing- it’s like Black Forest cake, cherry cheesecake, and brownies and mixed into one indulgence. I added a bit more cherry pie filling (homemade from sour cherries) but otherwise followed the recipe as written. SO GOOD! It is goopy when you pull it out but sets up nicely- I found it cuts better day 2.
The Recipe Rebel says
Hi Sherri! So glad you enjoyed the recipe. Thank you for this kind review.
Kelly says
Hi there, could you sub a different flour to make this gluten free?
The Recipe Rebel says
Hi Kelly, I haven’t tried it myself but you should be able to use a gluten free 1:1 baking flour. If you decide to experiment, let me know how it goes!
Julie says
I make these gluten free and am very happy with Bob’s Red Mill 1 to 1 Baking Flour. Family says you’d never guess they are gluten free.
Marisa says
So for the cheesecake filling, do I use regular granulated sugar or icing sugar?
The Recipe Rebel says
Hi Marisa, it’s granulated sugar! I’ll fix that so it’s not confusing. Thank you!
Donna Long says
The recipe calls for a cup of cocoa. Is that actually Hersheys cocoa? ,,,,,or sugared cocoa powder? I cup of plain chocolate powder seems like an awful lot.
Lookin’ forward to your reply. Thx bunches
Donna
The Recipe Rebel says
Hi Donna! It’s the Hersheys cocoa or any brand you’d like to use. Hope you enjoy it!
Helen says
Question: I live at an altitude higher than 6,000 ft. What adjustments is needed for this recipe so it doesn’t become flat. This may help others who also live higher than 3,000 ft.
The Recipe Rebel says
Hi Helen! I’m sorry I am not able to recommend anything due to not having any knowledge at higher altitude baking. I think there are lots of resources online that can point in the right direction.
Jackie says
Made these today – awesome – and they came out exactly as the recipe and image shown!
The Recipe Rebel says
Hi Jackie! So glad you enjoyed the recipe! Thank you for this kind review!
Bobbi McQueen says
Can you use a boxed brownie mix
The Recipe Rebel says
Hi Bobbi! I’ve never tested this recipe with a boxed mix. If you decide to experiment, let me know how it goes!
Karen McLoon says
I tried this with a boxed mix Pecan Brownies
I cooked it for 45 minutes at 350 degrees.
They came out like it was undercooked.
Is this how it is suppose to be?
Can I put it back in the oven to cook longer?
The Recipe Rebel says
Hi Karen! I really can’t advise due to this recipe doesn’t call for a boxed mix and I would have no idea why it wasn’t cooked. Sorry!
Jen says
This has become a family favorite and we have made it 6 times so far! We have shared these with family members and everyone has loved them. Thank you for a great recipe!
The Recipe Rebel says
Hi Jen! So glad you enjoyed the recipe! Thank you for this review!
Richard H Clark says
You may want to try this for spreading the batter on top of the filling. I used a wide spatula and spread the batter over the top from side to side, end to end ,controlling the thickness. Then picked up either end an peeled it off in one piece and then put it on the top of the filling. It covers really well. It’s a little messy but it worked for me.
The Recipe Rebel says
Hi Richard! Thanks for your feedback.
Vanessa says
Just wondering, can these be frozen? I am hoping to include them for Christmas baking.
Ashley Fehr says
Absolutely! They freeze perfectly