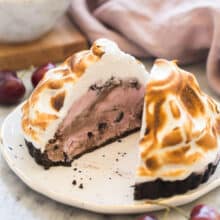
These Baked Alaska Tarts are a mini version of a classic Baked Alaska, made with a no bake cookie crust, filled with frozen yogurt and topped with toasted meringue! With step by step recipe video.
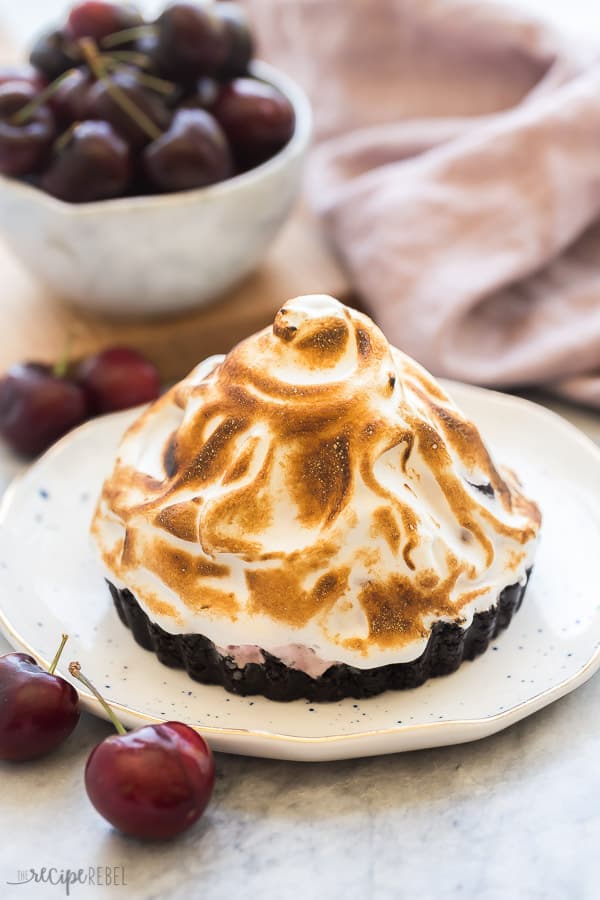
Summer is in full swing and we are cooling off with these fun Baked Alaska Tarts!
How beautiful are they?
Making a full sized Baked Alaska can seem intimidating, and sometimes you don’t need quite so much dessert (although if you ask my family, there is never too much!).
These Baked Alaska Tarts are a fun to make and easy to make ahead and pull out for a party or last minute guests!
Plus, meringue freezes perfectly so even if you’re not having guests anytime soon, you can just pull out a slice whenever you need a treat.
They are made lighter with Chapman’s Frozen Yogurt, and any flavor would work great in here!
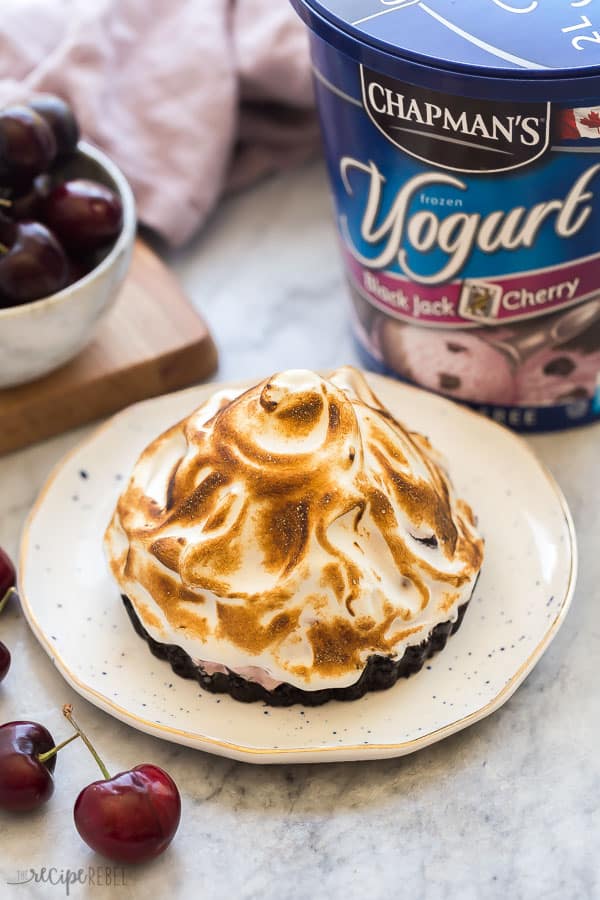
You can also check out Chapman’s Sorbet options, which would be a fun and colorful twist as well.
How are these Baked Alaska Tarts different from classic Baked Alaska?
Traditionally, Baked Alaska is made by placing softened ice cream in a round bowl, then topping with a cake crust and refreezing before topping with meringue.
These Baked Alaska Tarts are made with a no bake cookie crust in individual tart shells, which means that they can be made without the use of the oven (a big plus when that summer sun is beating down!).
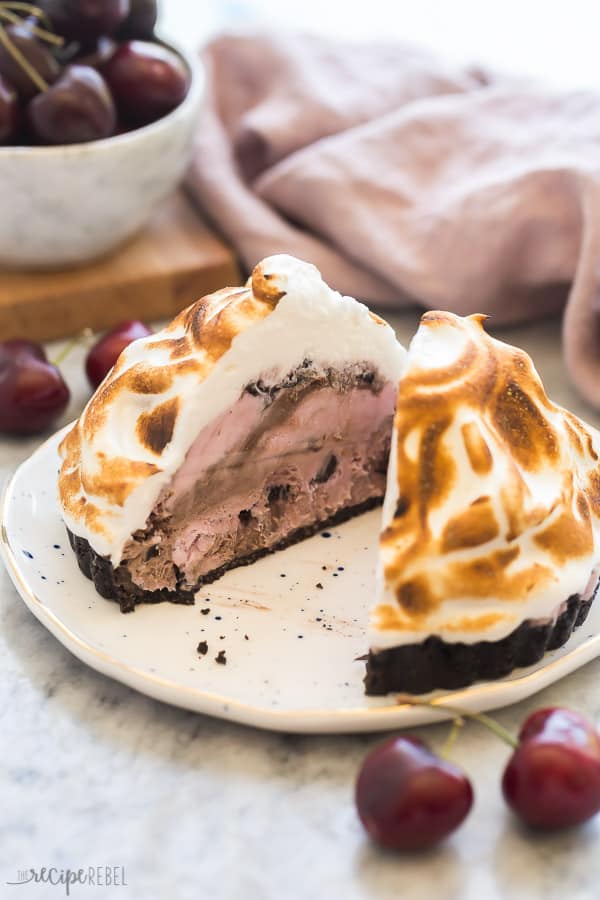
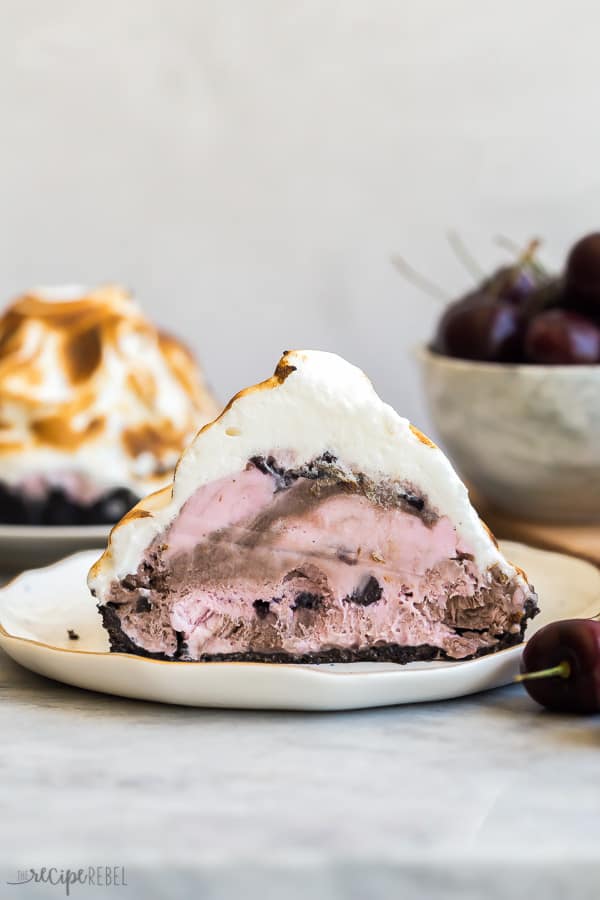
We then fill our cookie crusts with scoops of Chapman’s Frozen Yogurt (I used Black Jack Cherry!), round the top, and freeze solid.
The rest of the process is similar to traditional Baked Alaska — top with meringue and torch to brown, then serve.
These tarts are perfect for those who have a thing for Baked Alaska but want to be able to pull out a little bit at a time. Once you’ve toasted the meringue, you can store up to 3 months!
Two ways to toast meringue:
I love using a kitchen torch to toast meringue. I know a lot of people don’t have one, but they are inexpensive and so handy when you need them!
You can also bake (obviously!) these mini Baked Alaskas, it is just a little harder to keep an eye on the meringue and get it to toast evenly.
With a kitchen torch, I can easily control which areas are browned and which are not.
If you are using the broil function on the oven, just be sure to watch constantly and rotate the tarts as needed.
Variations on these Baked Alaska Tarts:
- Swap the chocolate cookies for vanilla or another flavor — get creative with it! Peanut butter, gingernaps, maple — any cookie that is a hard sandwich cookie with frosting in it can be easily replaced.
- Swap the Frozen Yogurt for sorbet or one of Chapman’s Premium ice creams (can you imagine these made with Chocolate Fudge Brownie or Heavenly Hash?!)
- You can press the crust into a 9×13″ pan, then top with the Frozen Yogurt and refreeze. Top with meringue and toast! A simple summer dessert if you don’t have any tart pans.
- Make individual Baked Alaska Tarts — if you want to make these into a smaller serving (I find the 4.5″ tart pans are perfect for two), you can make these in silicone muffin cups for a cute twist!
This post was sponsored by Chapman’s Ice Cream and I was compensated for my time in creating this recipe — thank you for supporting the brands that make The Recipe Rebel possible!
Baked Alaska Tarts
Ingredients
Crust
- 24 chocolate sandwich cookies, with filling (like Oreo)
- 1/4 cup melted butter
Filling
- 2 litres Chapman's Black Jack Cherry Frozen Yogurt
Meringue
- 5 egg whites
- 1 teaspoon vanilla extract
- 1/4 teaspoon cream of tartar
- 1 pinch salt
- 1/2 cup granulated sugar
Instructions
Crust:
- In a food processor, process cookies and melted butter until smooth. (Alternatively, you could crush the cookies by hand and stir in melted butter).
- Press into the bottom and up the sides of 6 4-5" tart shells.
Filling:
- Allow frozen yogurt to soften on the counter for 5 minutes.
- Divide Chapman's Frozen Yogurt between tart shells, shaping the top into a rounded mound as much as possible using a spreader or knife.
- Place in the freezer for 3-4 hours or until completely frozen.
Meringue:
- In a clean bowl, with clean beaters or a whisk attachment on an electric mixer, beat egg whites until frothy.
- Add vanilla, cream of tartar and salt, and beat until soft peaks form.
- Add sugar, one tablespoon at a time, until sugar is dissolved, and egg whites are stiff and glossy. Rub a small amount between your fingers to ensure it is smooth and not gritty.
- Remove tarts from freeze and remove from tart shells.
- Place on serving plates, if using a kitchen torch for meringue, or on a baking sheet, if using the broiler. If using the broiler, preheat while making meringue.
- Spread meringue over each tart, swirling as desired to make designs. Use a kitchen torch to brown the meringue to desired coloring, or broil for 4-5 minutes, turning in the oven as necessary.
- Serve or place back in the freezer to freeze solid. Store leftovers in the freezer.
Notes
Nutrition Information
Want to save this recipe?
Create an account easily save your favorite content, so you never forget a recipe again.
Tried this recipe?
Tag @thereciperebel or hashtag #thereciperebel — I love to see what you’re making!
Tag @thereciperebel
Tara says
Thanks for breaking this down to make them so simple. And I love the individual servings!
Ashley Fehr says
Thanks Tara! We love them too!
Jen says
The hardest part was waiting for it to freeze! A true test of patience when you know this yummy treat is waiting for you. Loved it!
Ashley Fehr says
Thanks Jen!
Lisalia says
The only thing better than a baked alaska is INDIVIDUAL baked alaskas for everyone! So pretty and SO SO good. Surprisingly this was easy to make. Thanks for the recipe!
Ashley Fehr says
Thanks Lisalia! Individual is way more fun!